Thursday, January 5, 2017

Install Latest PhpMyAdmin in RHEL/CentOS 7/6

Step 1: Install EPEL and Remi Repositories

On RHEL/CentOS 7

# rpm -Uvh http://dl.fedoraproject.org/pub/epel/7/x86_64/e/epel-release-7-8.noarch.rpm
# rpm -Uvh http://rpms.famillecollet.com/enterprise/remi-release-7.rpm

On RHEL/CentOS 6

-------------- On RHEL/CentOS 6 - 32-bit --------------
# rpm -Uvh http://download.fedoraproject.org/pub/epel/6/i386/epel-release-6-8.noarch.rpm
# rpm -Uvh http://rpms.famillecollet.com/enterprise/remi-release-6.rpm
-------------- On RHEL/CentOS 6 - 64-bit --------------
# rpm -Uvh http://download.fedoraproject.org/pub/epel/6/x86_64/epel-release-6-8.noarch.rpm
# rpm -Uvh http://rpms.famillecollet.com/enterprise/remi-release-6.rpm

Step 2: Installing PhpMyAdmin Web Interface

2. Once you’ve installed above repositories, now its’ time to install PhpMyAdmin with the help of following command as shown.
# yum --enablerepo=remi install phpmyadmin

yum --enablerepo=remi,remi-test install phpmyadmin

Tuesday, January 3, 2017

Install CPAN modules into your local Perl library using CPAN

# perl -MCPAN -e shell

cpan> install Bundle::CPAN

cpan> reload cpan


cpan> install DateTime::TimeZone

How To Install Java on Ubuntu with Apt-Get & OEL ,RHEL with yum or manually

sudo apt-get update

java -version

To install OpenJDK 7, execute the following command:

sudo apt-get install openjdk-7-jre

sudo yum install openjdk-7-jdk

sudo apt-get install oracle-java6-installer

sudo apt-get install oracle-java7-installer


sudo apt-get install oracle-java8-installer

sudo update-alternatives --config java

It will usually return something like this if you have 2 installations
There are 2 choices for the alternative java (providing /usr/bin/java).
Selection    Path                                            Priority   Status
------------------------------------------------------------
* 0            /usr/lib/jvm/java-7-oracle/jre/bin/java          1062      auto mode
  1            /usr/lib/jvm/java-6-openjdk-amd64/jre/bin/java   1061      manual mode
  2            /usr/lib/jvm/java-7-oracle/jre/bin/java          1062      manual mode


Or download setup from oracle site and install java & configure manually

To set the JAVA_HOME environment variable

Set the path of the Java 

Run in terminal 

# alternatives --install /usr/bin/java java /jdk1.6/bin/java 120    

Note :"jdk1.6/bin/java 120" location of java installed folder, if installed java manually .

# alternatives  --config java

Edit the basj profile:- 
   cd ~
   vi .bash_profile

   JAVA_HOME=/jdk1.6/bin/java
   export PATH JAVA_HOME


   source .bash_profile

Exit command
:wq!


Done .Verify 

# java -version

# which java

Sunday, January 1, 2017


Install SSH2 extension for PHP on RHEL/CentOS 7

Update and install the necessary packages

#  yum update

#  yum install  make gcc  libssh2  php-devel php-pearlibssh2-devel

#  pecl install -f ssh2

Once the package has been installed in your system, we need to configure the extension to PHP (php.ini  or ssh2.ini)

# echo "extension=ssh2.so" >  /etc/php.d/ssh2.ini

or

# echo "extension=ssh2.so"  > /etc/php.ini

Finally restart your web server

# service restart httpd.service

Now, check the module whether is configure with PHP,

# php -m | grep ssh2
1
ssh2

Also can  check in your phpinfo();


Update perl modules

perl -MCPAN -e "upgrade /(.\*)/"

Oracle Linux 7 Installation

Basic Installation
1.   Boot from the DVD. Use the up arrow to pick the "Install Oracle Linux 7.0" option and hit the return key.

2.   Select the appropriate language and select the "Set keyboard to default layout for selected language" option, then click the "Continue" button.

Click the "I want to proceed." button on the pre-release software warning screen.
3.   You are presented with the "Installation Summary" screen. You must complete any marked items before you can continue with the installation. Depending on your requirements, you may also want to alter the default settings by clicking on the relevant links.

Click the "Installation Destination" link.
4.   If you are happy to use automatic partitioning of the whole disk, click the "Done" button to return to the previous screen.

If you want to modify the partitioning configuration, click the "Continue" button and work through the partitioning screens.
5.   It would be advisable to click on the "Software Selection" link and pick the following options if you want a GUI console.
o   Base Environment > Server with GUI
o   Add-Ons for Selected Environment > Compatibility Libraries
o   Add-Ons for Selected Environment > Development Tools
Once you have completed your selections, click the "Done" button.

6.   Once you have completed your alterations to the default configuration, click the "Begin Installation" button.

7.   Click the "Root Password" link.

8.   Enter the root password and click the "Done" button.
Click the "User Creation" link.

9.   Enter the user details and select the "Make this user administrator" option, then click the "Done" button.

10.  Wait for the installation to complete. When prompted, click the "Reboot" button.

11.  Click the "License Information" link. Check the "I accept the license agreement" checkbox and click the "Done" button. When you return to the previous screen, click the "Finish Configuration" button.

12.  Decide if you want to use Kdump and click the "Forward" button.

13.  Decide if you want to set up software updates and click the "Forward" button. If you chose not to register with ULN, you will need to confirm you decision also.

14.  Click the "Forward" button.

15.  On the sign-in screen, click on the user you want to log in as.

Then Login in VM
Network Configuration
·       If you are using DHCP to configure your network settings, then ignore the following network configuration screens, otherwise click the network icon on the top bar and click the "Network Settings" link. You are then presented with the "Settings" screen. Highlight "Wired", flick the switch to "ON" and click the cog icon at the bottom-right.
·       Click the IPv4 option, select the "Manual" method and enter the appropriate IP address and subnet mask, default gateway and primary DNS, then click the "Apply" button.
·       Close the "Network" dialog.

SELinux
·       If the OS is to be used for an Oracle installation, it is easier if Secure Linux (SELinux) is disabled or switched to permissive. To do this edit the "/etc/selinux/config" file, making sure the SELINUX flag is set as follows.
SELINUX=permissive
If SELinux is configured after installation, the server will need a reboot for the change to take effect.
Firewall
·       If the OS is to be used for an Oracle installation, it is easier if the firewall is disabled. This can be done by issuing the following commands from a terminal window as the "root" user.
·         # systemctl stop firewalld
# systemctl disable firewalld
You can install and configure it later if you wish.
SSH
·       Make sure the SSH daemon is started using the following commands.
·         # systemctl start sshd.service
# systemctl enable sshd.service


Friday, December 30, 2016

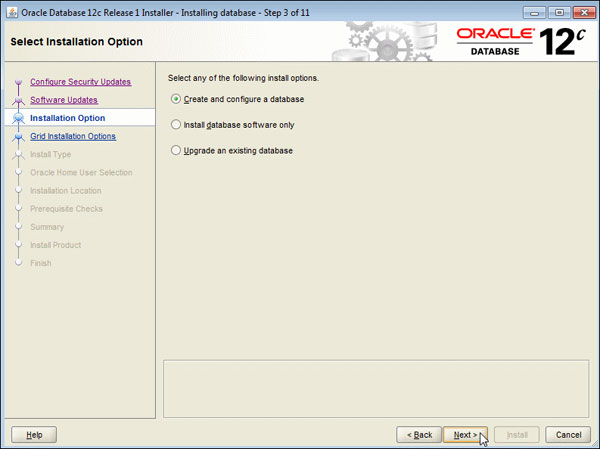
Installing the Oracle database Software


Installing the Oracle database Software


Installing the Oracle database Software
You will be downloading the files required to install Oracle database on a Windows environment.
Open a web browser of your choice and navigate to http://www.oracle.com/technetwork/database/windows/whatsnew/index.html. By default, the page displays the What’s New tab, showcasing news about Oracle on Windows.

Click the Downloads tab.

Click on the latest version of Oracle Database 12c (x64).

Read More..

Creating a database on Oracle 12 c server


Creating a database on Oracle 12 c server

  1. Go to Start -  > All Programs -> Oracle-OraDB12Home -> Configuration and Migration Tools ->
Database Configuration Assistant (right click on it and Run as Administrator)


  1. Select “Create Database” option and click “Next” button.


  1. Enter database name, password and select database character Set. And then click “Next” button.

Read More


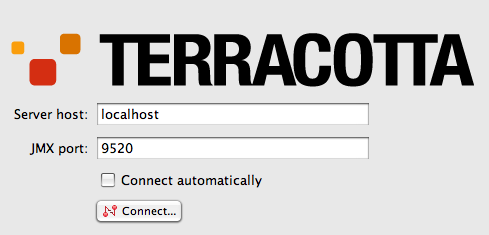
Install and Configure Terracotta server

Install and Configure Terracotta server


Download Latest Terracotta file Give permission  to file i.e chmod +x   .tar extract using this command or as per your options tar zxvf  .tar Now, check this

Installing Active MQ & Service in Windows


Installing Active MQ & Service in Windows

Installation Procedure for Windows Windows Binary Installation Download and install the binary distribution on a Windows system Click the  http://activemq.apache.org/download.html Select the latest distribution (for older releases,

Freecharge http://magazie.in/freecharge/


http://magazie.in/freecharge/

Offer: 100% cashback on recharges & bill payments of any value. Valid for new users only. Max cashback of Rs.55 Coupon: NEW55 Valid till: 31st Dec L.P: https://freecharge.com/
TnCs: -No Minimum Recharge/bill payment amount. Max cashback of Rs.55 -Valid once per New user/credit/debit card/mobile number -Valid on Credit Card/Debit Card transactions only -Offer is Not Valid for Airtel Transaction -Cashback will be credited to your Freecharge Wallet which can be redeemed within 185 days from date of credit, and is non transferable

Installing Apache httpd server with open ssl.

Make sure yum is active on the server.

Install the following packages on the machine.

yum install gcc

yum install glibc-devel

yum install gcc-c++

yum install compat-libstdc++-33

yum install libstdc++-devel

yum install elfutils-libelf-devel

yum install libaio-devel

yum install sysstat

yum install zlib-devel*


yum install openssl-devel.x86_64

Installing Open SSL


Download is available at below location https://www.openssl.org/source/
Extract it at a location
Execute the below command one by one to configure it:
cd openssl-1.0.2a
./config –prefix=/usr/local/openssl  -shared -fPIC –openssldir=/usr/local/openssl/
make
make test
make install

Installing Apache HTTPD


This will guide to install/configure the Apache HTTPD with Open SSL and other required modules.
Download is available at below location http://httpd.apache.org
Extract it at a location
tar zvfx httpd-2.2.31.tar.gz
cd httpd-2.2.31
Execute the below command to install it with modules:
./configure –prefix=/usr/local/apache2/ –enable-so –enable-ssl=shared –with-ssl=/usr/local/openssl/  –enable-rewrite –enable-proxy –enable-modules=”all ssl proxy” –enable-mods-shared=all –with-included-apr
make
make install
Test the installation with below command:

/usr/local/apache2/bin/apachectl -k start

RHEL 7 Installation on VMware with screenshots

http://magazie.in/841-2/
Step 1 :
Give hardware resource and configure VM as per your need.
Then , Select ISO image and attach on VM .You can choose below any of options.


After selecting media first ,select Install Red Hat Enterprise Linux 7.0

Converting RHEL To OEL YUM


# cd /etc/yum.repos.d # wget  http://public-yum.oracle.com/public-yum-ol6.repo # yum repolist Might give an error Could not open/read file:///etc/pki/rpm-gpg/RPM-GPG-KEY-oracle To resolve this use the following command # rpm --import http://oss.oracle.com/ol6/RPM-GPG-KEY-oracle # rpm -q gpg-pubkey-ec551f03-4c2d256a After the updates are complete system might start throwing a CERT Error rhn-plugin: ERROR: can not find ULN CA file: /usr/share/rhn/RHNS-CA-CERT ======================================================================== To resolve this, follow the below, # cd /usr/share/rhn You will find the cert ULN-CA-CERT # vi /etc/sysconfig/rhn/up2date sslCACert=/usr/share/rhn/RHNS-CA-CERT In this line change RHNS-CA-CERT to ULN-CA-CERT Should look like sslCACert=/usr/share/rhn/ULN-CA-CERT Now run # yum info Should work fine

Install Docker on Oracle Linux


  1. Log into your machine as a user with sudo or root
  2. Make sure your existing yum packages are up-to-date.
  1. $ sudo yum update
  2. Add the yum repo yourself.
For version 6:
 $ sudo tee /etc/yum.repos.d/docker.repo <<-EOF [
dockerrepo] 
name=Docker Repository
 baseurl=https://yum.dockerproject.org/repo/main/oraclelinux/6
 enabled=1
 gpgcheck=1
 gpgkey=https://yum.dockerproject.org/gpg
 EOF
 For version 7:
 $ cat >/etc/yum.repos.d/docker.repo <<-EOF
 [dockerrepo] name=Docker Repository baseurl=https://yum.dockerproject.org/repo/main/oraclelinux/7

enabled=1

 gpgcheck=1

 gpgkey=https://yum.dockerproject.org/gpg

 EOF
  1. Install the Docker package.
  1. $ sudo yum install docker-engine
  1. Start the Docker daemon.
On Oracle Linux 6: $ sudo service docker start On Oracle Linux 7: $ sudo systemctl start docker.service
  1. Verify docker is installed correctly by running a test image in a container.
  2. $ sudo docker run hello-world
To create the docker group and add your user:
  1. Log into Oracle Linux as a user with sudo
  2. Create the docker
  3. $ sudo groupadd docker
  4. Add your user to docker
  1. $ sudo usermod -aG docker username
  1. Log out and log back in.
This ensures your user is running with the correct permissions.
  1. Verify your work by running docker without sudo.
  2. $ docker run hello-world
If this fails with a message similar to this: Cannot connect to the Docker daemon. Is 'docker daemon' running on this host? Check that the DOCKER_HOST environment variable is not set for your shell. If it is, unset it. Configure Docker to start on boot You can configure the Docker daemon to start automatically at boot. On Oracle Linux 6: $ sudo chkconfig docker on On Oracle Linux 7: $ sudo systemctl enable docker.service Use the btrfs storage engine Docker on Oracle Linux 6 and 7 supports the use of the btrfs storage engine. Before enabling btrfs support, ensure that /var/lib/docker is stored on a btrfs-based filesystem. Review Chapter 5 of the Oracle Linux Administrator’s Solution Guide for details on how to create and mount btrfs filesystems. To enable btrfs support on Oracle Linux:
  1. Ensure that /var/lib/docker is on a btrfs filesystem.
  2. Edit /etc/sysconfig/docker and add -s btrfs to the OTHER_ARGS
  3. Restart the Docker daemon:
Uninstallation To uninstall the Docker package: $ sudo yum -y remove docker-engine The above command will not remove images, containers, volumes, or user created configuration files on your host. If you wish to delete all images, containers, and volumes run the following command: $ rm -rf /var/lib/docker You must delete the user created configuration files manually.

Installing compat-libstdc++-33 on RHEL 7


compat-libstdc++-33-3.2.3 (x86_64) package [root@ip-xxx-xx-x-xxx ~]# yum install compat-libstdc++-33 Loaded plugins: amazon-id, langpacks, rhui-lb No package compat-libstdc++-33 available. Error: Nothing to do [root@ip-xxx-xx-x-xxx ~]#

Prettysecret

Offer: 15% off on Rs. 1099 & above
Coupon: PRETTY15
Valid till: 2nd Jan

Offer: 10% off on Rs. 1000 & above
Coupon: PS10
Valid till: 2nd Jan
Offer: Upto 60% + Extra 15% off on Rs. 1499 & above
Coupon: SECRET15
Valid till: 2nd Jan
Offer:Rs. 300 off on Rs. 1500 & above
Coupon: NEWPS300
Valid till: 2nd Jan
TnCs:
-Valid on first purchase only
Offer: Rs. 200 off on Rs. 999 & above
Coupon: Welcome200
Valid till: 2nd Jan
TnCs:
-Valid on first purchase only
Offer: 15% off on Rs. 1099 (Sitewide)
Coupon: PRETTY15
Valid till: 2nd Jan

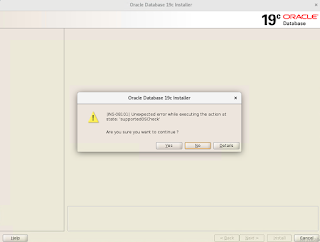
Oracle Database 19c Installation on Oracle Linux 7

Pre-installation settings before installing Oracle Database 19c SELinux If the OS is to be used for an Oracle installation, it is ...