Thursday, June 21, 2018

Install qpid and qpid-tools in Linux 6

Follow the steps

# yum install qpid-tools

Or

# yum install -y qpid-cpp-server qpid-cpp-server-ssl qpid-cpp-client qpid-tools

# yum remove qpid-cpp-server qpid-cpp-server-ssl qpid-cpp-client qpid-tools

clip_image001

clip_image002

# To start the service:

service qpidd start

# To stop the service:

service qpidd stop

# To restart the service:

service qpidd restart

# To check the status:

service qpidd status

# To force reload:

service qpidd force-reload

Linux system configuration check

Install this package

# yum -y install lshw

Display Hardware Infomation.

# lshw

clip_image001

To get the system memory info:

$ cat /proc/meminfo

clip_image002

To get the CPU info:

$ cat /proc/cpuinfo

clip_image003

Wednesday, June 20, 2018

Tomcat installation on Linux

clip_image001

Download tomcat setup or if you have copy it using WinSCP tool

Setup link :-

http://redrockdigimark.com/apachemirror/tomcat/tomcat-7/v7.0.82/bin/apache-tomcat-7.0.82.tar.gz

Create a folder and copy setup. Or choose your preferred location where you want to install.

# mkdir setup

# chmod 777 setup/

clip_image002

# cd /setup

# ls

# chmod 777 apache-tomcat-6.0.44.tar.gz

# tar zxvf apache-tomcat-6.0.44.tar

clip_image003

# cd apache-tomcat-6.0.44.tar

# chmod -R 777 *

clip_image004

clip_image005

# ./startup.sh

clip_image006

NFS – Folder mapping – Autofs

Create a shared folder on one server and map this to multiple servers.

Uses nfs, autofs tools.

This works on most Linux flavors.

Scenario:-

Server1 – Create folder /SharedFolder, share this over network, and map this to Server2, Server3.

Steps:-

Server1## mkdir /sharedfolder

Server1## vi /etc/exports

/sharedfolder Server2(rw,no_root_squash) Server3(rw,no_root_squash)

Server1## chkconfig –levels 345 nfs on

Server1## service nfs restart

Server1## exportfs

Server2## vi /etc/auto.master

#Comment all the lines with # as first character’s and add these lines

/- /etc/auto.direct

+auto.master

Server2## vi /etc/auto.direct

/mnt/sharedfolder -fstype=nfs,rw,soft,intr Server1:/sharedfolder

Server2## chkconfig –levels 345 autofs on

Server2## service autofs restart

[comment- network folder is mounted to /mnt/sharedfolder directory. No need to create sharedfolder directory under /mnt on server2##, it will get created automatically from network mount. ]

Server3## Proceed the same like Server2## to mount it.

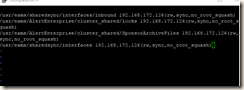
mount -t nfs 112.168.171.231:/New/mount /New/mount

# mount 162.168.112.8:/usr/eams/sharedsync/interfaces /usr/eams/sharedsync/interfaces

clip_image001

How to Install MariaDB on CentOS 7

Update your system:

sudo yum update

Install and Start MariaDBPermalink

sudo yum install mariadb-server

sudo systemctl enable mariadb

sudo systemctl start mariadb

/usr/bin/mysql_secure_installation

NOTE: RUNNING ALL PARTS OF THIS SCRIPT IS RECOMMENDED FOR ALL MariaDB

SERVERS IN PRODUCTION USE! PLEASE READ EACH STEP CAREFULLY!

In order to log into MariaDB to secure it, we'll need the current

password for the root user. If you've just installed MariaDB, and

you haven't set the root password yet, the password will be blank,

so you should just press enter here.

Enter current password for root (enter for none):

OK, successfully used password, moving on...

Setting the root password ensures that nobody can log into the MariaDB

root user without the proper authorisation.

Set root password? [Y/n] Passw0rd

Set root password? [Y/n] y

New password:

Re-enter new password:

Password updated successfully!

Reloading privilege tables..

... Success!

By default, a MariaDB installation has an anonymous user, allowing anyone

to log into MariaDB without having to have a user account created for

them. This is intended only for testing, and to make the installation

go a bit smoother. You should remove them before moving into a

production environment.

Remove anonymous users? [Y/n]

... Success!

Normally, root should only be allowed to connect from 'localhost'. This

ensures that someone cannot guess at the root password from the network.

Disallow root login remotely? [Y/n]

... Success!

By default, MariaDB comes with a database named 'test' that anyone can

access. This is also intended only for testing, and should be removed

before moving into a production environment.

Remove test database and access to it? [Y/n]

- Dropping test database...

... Success!

- Removing privileges on test database...

... Success!

Reloading the privilege tables will ensure that all changes made so far

will take effect immediately.

Reload privilege tables now? [Y/n] y

... Success!

Cleaning up...

All done! If you've completed all of the above steps, your MariaDB

installation should now be secure.

Thanks for using MariaDB!

RPM packages commands

Check an RPM Signature Package

rpm --checksig mysql57-community-release-el7-11.noarch.rpm

Install an RPM Package

rpm -ivh mysql57-community-release-el7-11.noarch.rpm

check dependencies of RPM Package before Installing

rpm -qpR mysql57-community-release-el7-11.noarch.rpm

Install a RPM Package Without Dependencies

rpm -ivh --nodeps mysql57-community-release-el7-11.noarch.rpm

check an Installed RPM Package

rpm -q mysql57-community-release-el7-11.noarch.rpm

List all files of an installed RPM package

rpm -ql mysql57-community-release-el7-11.noarch.rpm

List Recently Installed RPM Packages

rpm -qa --last

List All Installed RPM Packages

rpm -qa

Upgrade a RPM Package

rpm -Uvh mysql57-community-release-el7-11.noarch.rpm

Remove a RPM Package

rpm -evv mysql57-community-release-el7-11.noarch.rpm

Remove an RPM Package Without Dependencies

rpm -ev --nodeps mysql57-community-release-el7-11.noarch.rpm

Query a Information of Installed RPM Package

rpm -qi mysql57-community-release-el7-11.noarch.rpm

Preventing Yum from Updating the Kernel

However, if you don’t ever want to just blindly have the kernel updated, you can add the following to your /etc/yum.conf file:

exclude=kernel*

Or, if you insist on using a vanilla configuration file and control everything via the CLI, use

#yum –xclude=kernel* update

Both of these methods will eliminate the kernel from being updated or even included in the potential update listing.

sudo yum update --skip-broken

New Oracle Linux 7.2 Installation partition

Attach the installation CD and on allotting HDD space check it manual partitioning.

Follow the configuration steps.

clip_image001

Select the partition scheme as per your requirement.

clip_image002

Give the mount point size in that box and desired capacity.

clip_image003

It will create the partitions like that above.

clip_image004

Next follow the default values you need to install.

PHP 7.0 on CentOS/RHEL 6.9 and 7.4 via Yum

CentOS/RHEL 7.x:

yum install epel-release
rpm -Uvh https://mirror.webtatic.com/yum/el7/webtatic-release.rpm

CentOS/RHEL 6.x:

yum install epel-release
rpm -Uvh https://mirror.webtatic.com/yum/el6/latest.rpm

Now you can install PHP 7.0’s mod_php SAPI (along with an opcode cache) by doing:

yum install php70w php70w-opcache

You can alternatively install PHP 7.0’s php-fpm SAPI (along with an opcode cache by doing:

yum install php70w-fpm php70w-opcache

Sentrifugo Installation using XAMPP on CentOS/RHEL/OEL 7/6/5

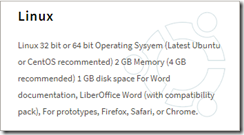
System Requirements for Sentrifugo Installation
clip_image001

XAMPP is an easy to install Apache distribution containing MariaDB, PHP, and Perl. Just download and start the installer.
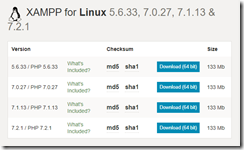
Check and download the required version.


 https://www.apachefriends.org/download.html#641
clip_image002

Xampp Download URL :-

https://downloadsapachefriends.global.ssl.fastly.net/xampp-files/7.2.1/xampp-linux-x64-7.2.1-0-installer.run?from_af=true

# cd /opt
# chmod 777 xampp-linux-x64-7.2.1-0-installer.run
[root@localhost~]# cd /opt
[root@localhost opt]# ls
rh Sentrifugo-Linux.zip xampp-linux-x64-7.2.1-0-installer.run
[root@localhost opt]# chmod 777 xampp-linux-x64-7.2.1-0-installer.run
[root@localhost opt]# chmod 777 Sentrifugo-v3.2.zip
[root@localhost opt]# wget https://excellmedia.dl.sourceforge.net/project/sentrifugo/Sentrifugo-v3.2.zip
[root@tec2more opt]# chmod 777 Sentrifugo-v3.2.zip
[root@localhost opt]# unzip Sentrifugo-v3.2
[root@localhost opt]# unzip Sentrifugo-Linux.zip
Archive: Sentrifugo-Linux.zip
creating: Sentrifugo_3.2/
inflating: Sentrifugo_3.2/.htaccess
creating: Sentrifugo_3.2/application/
creating: Sentrifugo_3.2/application/configs/
inflating: Sentrifugo_3.2/application/configs/application.ini
creating: Sentrifugo_3.2/application/controllers/
inflating: Sentrifugo_3.2/application/controllers/ErrorController.php
inflating: Sentrifugo_3.2/application/controllers/IndexController.php
creating: Sentrifugo_3.2/application/layouts/
creating: Sentrifugo_3.2/application/layouts/scripts/
inflating: Sentrifugo_3.2/application/layouts/scripts/analyticsheader.phtml
inflating: Sentrifugo_3.2/application/layouts/scripts/analyticslayout.phtml
inflating: Sentrifugo_3.2/application/layouts/scripts/assetsfooter.phtml
inflating: Sentrifugo_3.2/application/layouts/scripts/assetsheader.phtml
inflating: Sentrifugo_3.2/application/layouts/scripts/defaultfooter.phtml
inflating: Sentrifugo_3.2/application/layouts/scripts/defaultheader.phtml
inflating: Sentrifugo_3.2/application/layouts/scripts/expensesfooter.phtml
inflating: Sentrifugo_3.2/application/layouts/scripts/expensesheader.phtml
inflating: Sentrifugo_3.2/application/layouts/scripts/hrmsfooter.phtml
inflating: Sentrifugo_3.2/application/layouts/scripts/hrmsheader.phtml
inflating: Sentrifugo_3.2/application/layouts/scripts/layout.phtml
inflating: Sentrifugo_3.2/ZendX/JQuery/View/Helper/JQuery/Container.php
inflating: Sentrifugo_3.2/ZendX/JQuery/View/Helper/jquery-ui-timepicker-addon.js
inflating: Sentrifugo_3.2/ZendX/JQuery/View/Helper/JQuery.php
inflating: Sentrifugo_3.2/ZendX/JQuery/View/Helper/Slider.php
inflating: Sentrifugo_3.2/ZendX/JQuery/View/Helper/Spinner.php
inflating: Sentrifugo_3.2/ZendX/JQuery/View/Helper/TabContainer.php
inflating: Sentrifugo_3.2/ZendX/JQuery/View/Helper/TabPane.php
inflating: Sentrifugo_3.2/ZendX/JQuery/View/Helper/UiWidget.php
inflating: Sentrifugo_3.2/ZendX/JQuery/View/Helper/UiWidgetPane.php
inflating: Sentrifugo_3.2/ZendX/JQuery.php
inflating: Sentrifugo_3.2/public/downloads/gettingstarted.pdf
Once Sentrifugo folder is extracted rename it .
[root@localhost opt]# ls


 rh Sentrifugo_3.2 Sentrifugo-Linux.zip xampp-linux-x64-7.2.1-0-installer.run
[root@localhost opt]# mv Sentrifugo_3.2/ Sentrifugo
[root@localhost opt]# ls
rh Sentrifugo Sentrifugo-Linux.zip xampp-linux-x64-7.2.1-0-installer.run
[root@localhost opt]# chmod -R 777 Sentrifugo
[root@localhost opt]# ls
rh Sentrifugo Sentrifugo-Linux.zip xampp-linux-x64-7.2.1-0-installer.run
[root@tec2more opt]# ls
rh Sentrifugo-Linux.zip xampp-linux-x64-7.2.1-0-installer.run
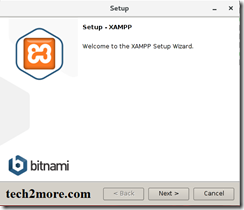
[root@localhost opt]# ./xampp-linux-x64-7.2.1-0-installer.run
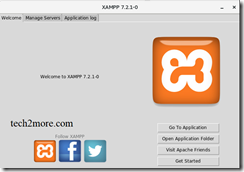
clip_image003
clip_image004

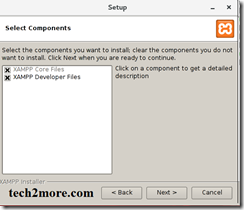
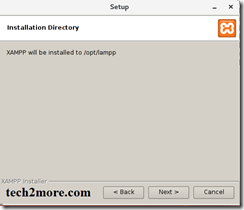
Choose the following options that you want to install.
clip_image005
clip_image006
clip_image007
clip_image008
clip_image009
clip_image010
clip_image011


Or
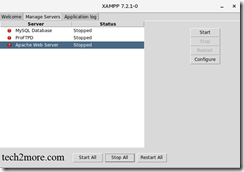
Start Xampp server using terminal
[root@localhost lampp]# ./lampp start
Starting XAMPP for Linux 7.2.1-0...
XAMPP: Starting Apache...ok.
XAMPP: Starting MySQL... .ok.
XAMPP: Starting ProFTPD....ok.
Check apache hit http://localhost
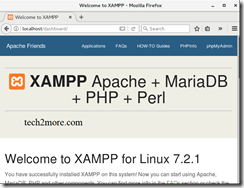
clip_image012

[root@localhost opt]# yum install postfix
Loaded plugins: langpacks, ulninfo
ol7_latest 23860/23860
Package 2:postfix-2.10.1-6.0.1.el7.x86_64 already installed and latest version
Nothing to do
[root@localhost opt]#systemctl start postfix
[root@localhost opt]# systemctl status postfix
● postfix.service - Postfix Mail Transport Agent
Loaded: loaded (/usr/lib/systemd/system/postfix.service; enabled; vendor preset: disabled)
Active: active (running) since Fri 2018-02-02 04:19:04 IST; 19h ago
Main PID: 2246 (master)
CGroup: /system.slice/postfix.service
├─ 2246 /usr/libexec/postfix/master -w
├─ 2272 qmgr -l -t unix -u
└─41748 pickup -l -t unix -u
Feb 02 04:18:59 localhost.localdomain systemd[1]: Starting Postfix Mail Trans...
Feb 02 04:19:04 localhost.localdomain postfix/master[2246]: daemon started --...
Feb 02 04:19:04 localhost.localdomain systemd[1]: Started Postfix Mail Transp...
Hint: Some lines were ellipsized, use -l to show in full.
Create fresh DB for Sentrifugo application using phpMyAdmin
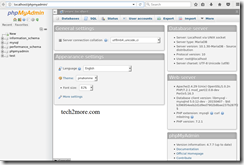
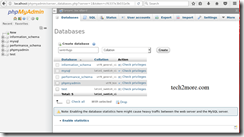
clip_image013
clip_image014

[root@localhost opt]# ls lampp Sentrifugo xampp-linux-x64-7.2.1-0-installer.run
rh Sentrifugo-Linux.zip
[root@localhost opt]# mv Sentrifugo lampp/htdocs/
[root@localhost opt]# ls
lampp rh Sentrifugo-Linux.zip xampp-linux-x64-7.2.1-0-installer.run
Now, Open the sentrifugo URL
http://localhost/Sentrifugo
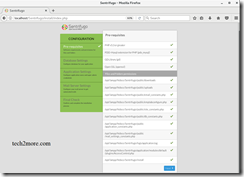
clip_image015

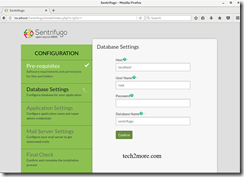
Check the Pre-requisites and permissions, that should be 777.
clip_image016

Connect the database.


clip_image017

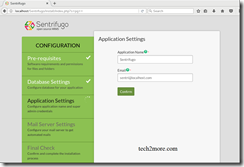
Give your application name i.e. Sentrifugo and its email ID.
clip_image018
clip_image019

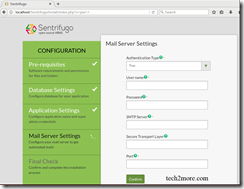
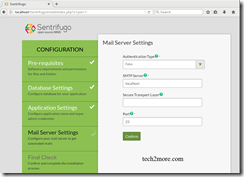
Authentication type :
True or False
Provide the email ID and password SMTP server details i.e. Secure transport layer like SSL,TLS etc. .Port 25 , 465 ,587 .
SSL - 25
SSL - 465
TLS - 587
clip_image020

Final check and finish.

clip_image021

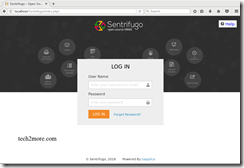
On next screen login details are shown, copied and login with these details.

clip_image022

Username : empp0001
Password : 5a74ab62e9ba1
clip_image023

Once you logged in configuration wizard will open.
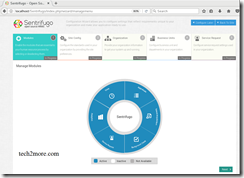
clip_image024

Install the required modules that you want. Set all -
  • Site Config
  • Organization
  • Business Units
  • Service Request
clip_image025

You can see the modules installed at top menu.
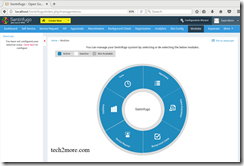
clip_image026

So, its installed and configured it as per your requirement. Thanks !!

How to uninstall IE11 From Windows 10/8/7

To uninstall IE11, follow these steps.

  1. Open “Control Panel“.
  2. Select “Programs“.
  3. Select “Turn Windows features on or off“.
  4. Uncheck “Internet Explorer 11“, then click “OK“.

clip_image001

  1. Select “Yes” on the warning about Turning off Internet Explorer 11.

After that it will prompt to restart the system.

Oracle Database 19c Installation on Oracle Linux 7

Pre-installation settings before installing Oracle Database 19c SELinux If the OS is to be used for an Oracle installation, it is ...