Saturday, February 29, 2020

How To Install Zabbix 4.4 Server On CentOS 7

Zabbix is an open source network monitoring software designed to monitor and track the status of various network devices, servers, and virtual machines
Update the system using below command
# yum update
Install required packages
# yum install  mariadb-server  httpd -y                          
# yum install php php-cli php-common php-devel php-pear php-gd php-mbstring php-mysql php-xml php-bcmath  


# systemctl start httpd
Install Repository with MySQL database
# mysql_secure_installation


Install yum repository to install Zabbix
CentOS/RHEL 7: 
After adding Zabbix apt repository in your system use following command to install Zabbix server.
 # yum install zabbix-server-mysql zabbix-web-mysql zabbix-agent zabbix-java-gateway

Create initial database schema
# mysql -u root -p
mysql> create database zabbix character set utf8 collate utf8_bin;
mysql> grant all privileges on zabbix.* to zabbix@localhost identified by 'Password';
FLUSH PRIVILEGES;
mysql> quit;


Import initial schema and data. You will be prompted to enter your newly created password.
 # zcat /usr/share/doc/zabbix-server-mysql*/create.sql.gz | mysql –u zabbix -p zabbix

Configure the database for Zabbix server
Edit file /etc/zabbix/zabbix_server.conf
Update the following database configurations. This will be used by Zabbix server to connect to the database.
DBHost=localhost
DBName=zabbix
DBUser=zabbix
DBPassword=password

Configure PHP for Zabbix frontend
Edit file /etc/httpd/conf.d/zabbix.conf, uncomment and set the right timezone for you.
# php_value date.timezone Asia/Kolkata


Start Zabbix server and agent processes and make it start at system boot:
# systemctl start zabbix-server zabbix-agent httpd mariadb
# systemctl enable zabbix-server zabbix-agent httpd mariadb

Now your Zabbix server is up and running!
Configure Zabbix frontend
Connect to your newly installed Zabbix frontend: http://server_ip_or_name/zabbix
Follow steps described in Zabbix documentation: Installing frontend
 Start using Zabbix

Check for pre-requisites
Check if you meet all the system requirements. If not configure your php.ini.
Configure DB Connection
Fill your DB details which you created and click on Next Step 
Zabbix server details
This is the host and port of running Zabbix server. As your Zabbix server is running on the same host, so keep the values unchanged. You can give a name for your instance.

 Pre-Installation Summary
This will give you a summary of your configuration. Click on Next Step

Install Zabbix
Click on Finish button to install Zabbix server

Install Zabbix
You will see a successful installation message on this page. This will also show you a message for the created configuration file.

Login to Zabbix
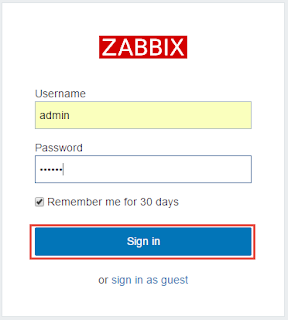
Login to Zabbix with following credentials
UserName          : Admin
Password    : Zabbix

You will see your Zabbix home screen now
Congratulation! Your Zabbix setup has been completed.


Saturday, February 22, 2020

Creating new users with the dsadd command

Adding a new user with the dsadd command with Command Prompt


Distinguished name (DN) for the new AD object, and is required.

Cn - comman name
Dc - Domain controller
Fn - First name
In - Last name
Pwd - Password


dsadd user “cn=Tech Bir,cn=Users,dc=kb,dc=com” -samid techbir -upn techbir@kb.com -fn Tech -ln Bir -display “Tech Bir” -disabled no -pwd “PassW0rd” -mustchpwd yes


After successfully user created. You can check by find users as like below.


See users properties and all details.


Creating new users with Active Directory Administrative Center


Active Directory Administrative Center is the easiest management tool to get to grips with. You’ll need to log in to Windows Server 2016 with a domain administrator account
 To run ADAC, start Server Manager by clicking the blue icon next to the Start button on the desktop taskbar. In Server Manager, select Active Directory Administrative Center from the Tools menu.

  In the Active Directory Administrative Center, click Users below ad (local) in the left pane.


In the Tasks pane on the right, click New under Users, and select User from the menu.
In the Create User dialog box, Start by filling out the First name and Last name fields, and the Full name.All new users must have a Same Account Name, which is the user’s AD logon name. Enter and confirm a password, and then click OK.


 The user will be required to change the password the first time they log on, and don’t forget that the password you set must meet the password complexity requirements set in domain policy.


How to create Domain user in Active Directory


Open Active Directory Users and Computers MMC


Right click the folder where you want to create the new user account, select new and then click user. If you have not created additional organizational units, you can put the new account in the Users folder.


First name: Fill in user’s first name.
Initials: Fill in user’s middle initials. This can be used if there are conflicts when creating the user logon name.
Last name: Fill in user’s last name.
Full name: This will fill in automatically.
User logon name: This is the name used to log into windows domain.


In the password and confirm password field type the user’s password, click next and finish.


This completes creating the new Active Directory user account.


 At this point you may need to open the account.


Add additional information such as: Address, Profile path, Logon script, Organization details and adding the user to other Active Directory groups to provide access to additional domain resources.


How to install Cisco VPN client on Window 10

From 2011 it's have been discontinued, Cisco VPN client is not supported by Windows 10. Cisco itself has stated in the past that the last supported operating system for its VPN client was Windows 7.

Download and install below setups.

First Install DNE update from below location


After DNE setup installation completed, 
Install Cisco VPN client

Follow the next steps by default no other changes require.

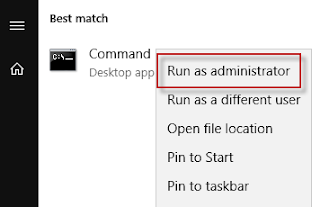
Extract the setup  and run as administrator vpnclient_setup and proceed the next steps and finish the setup.

Once installation done. Start the Cisco VPN application and add pcf profiles using imported button.

After all this, connect the profile that just added, it will prompt for user and password. Enter your credentials.


Follow the below steps: -
Open your Windows Registry Editor by typing regedit in the Window run.
From the window on right, select and right -click on Display Name and choose Modify from the menu. Alternatively, Double-click on Display Name.


Computer\HKEY_LOCAL_MACHINE\SYSTEM\CurrentControlSet\Services\CVirtA
For Windows 10 64bit (x64) operating systems, change the value data from @oem8.inf,%CVirtA_Desc%;Cisco Systems VPN Adapter for 64-bit Windows
to
Cisco Systems VPN Adapter for 64-bit Windows       (shown below):


The registry key now shows the correct DisplayName value data:


You should be able to connect to your VPN Router or Gateway without any problems.

Oracle Database 19c Installation on Oracle Linux 7

Pre-installation settings before installing Oracle Database 19c SELinux If the OS is to be used for an Oracle installation, it is ...